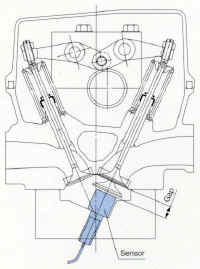
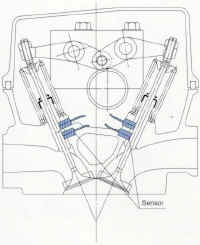
Example | Valve Lift Measurement | Valve Stem to Guide Clearance Measurement |
---|---|---|
Installation Diagram | ||
Purpose of Measurement | The amount of lift in the valve is measured without changing the valve. | Multiple sensors are attached to the valve guides to measure the gap displacement (valve behavior) between the valve stem and valve guide. |
Specifications | Operating Temperature: 180°C
Maximum
Measuring Range: 0 to 15mm *These are reference specifications. If your operating conditions require different specifications, contact AEC. We may have the sensor you need or would be pleased to manufacture a sensor to meet your requirements. |
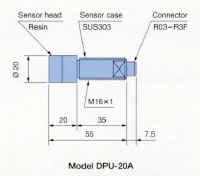
Operating Temperature: 180°C
Maximum
Measuring Range: 0 to 0.3mm *These are reference specifications. If your operating conditions require different specifications, contact AEC. We may have the sensor you need or would be pleased to manufacture a sensor to meet your requirements. |
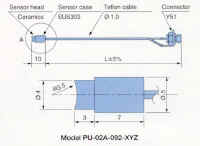
Remarks | Measurement is possible without changing the valve weight. However, the engine is not operational with this installation. | AEC can provide sensors with a variety of round surfaces to match your valve stem and guide geometry. Please contact us for assistance. |
Sensor |